4. Understanding Resources
The data for the Resources is gathered and put into the Widgets on the Dashboard. These Resources could be servers or network devices for a specific customer, different divisions of a corporation, or international offices. In this manner, the analyst can view different Resources being supported since each the Resources for each customer are identified. This section identifies how the Resources are set up and how to work with and maintain the Resources.
4.1. Working with the Resources
4.1.1. Viewing the Resource Dashboard
Additional information is shown on the Resource Dashboard includes:
Monthly Growth Rate
New Hosts Added
Host Not Reporting
HAWK Engines
Resource by Group
Non-Active Resources (those which have not reported in within the past 30 minutes)
Resources by Class Type
Detailed information about the resource, which includes the following: * Name of the Resource * Detailed information about the Resource * IPv4 and IPv6 Addresses for the Resource * System to which the Resource is assigned * Group to which the Resource belongs * Last time the Resource reported
In order to view the Dashboard for the Resources, follow these steps:
On the navigation panel, click on

The Resource Administration Management Dashboard opens.
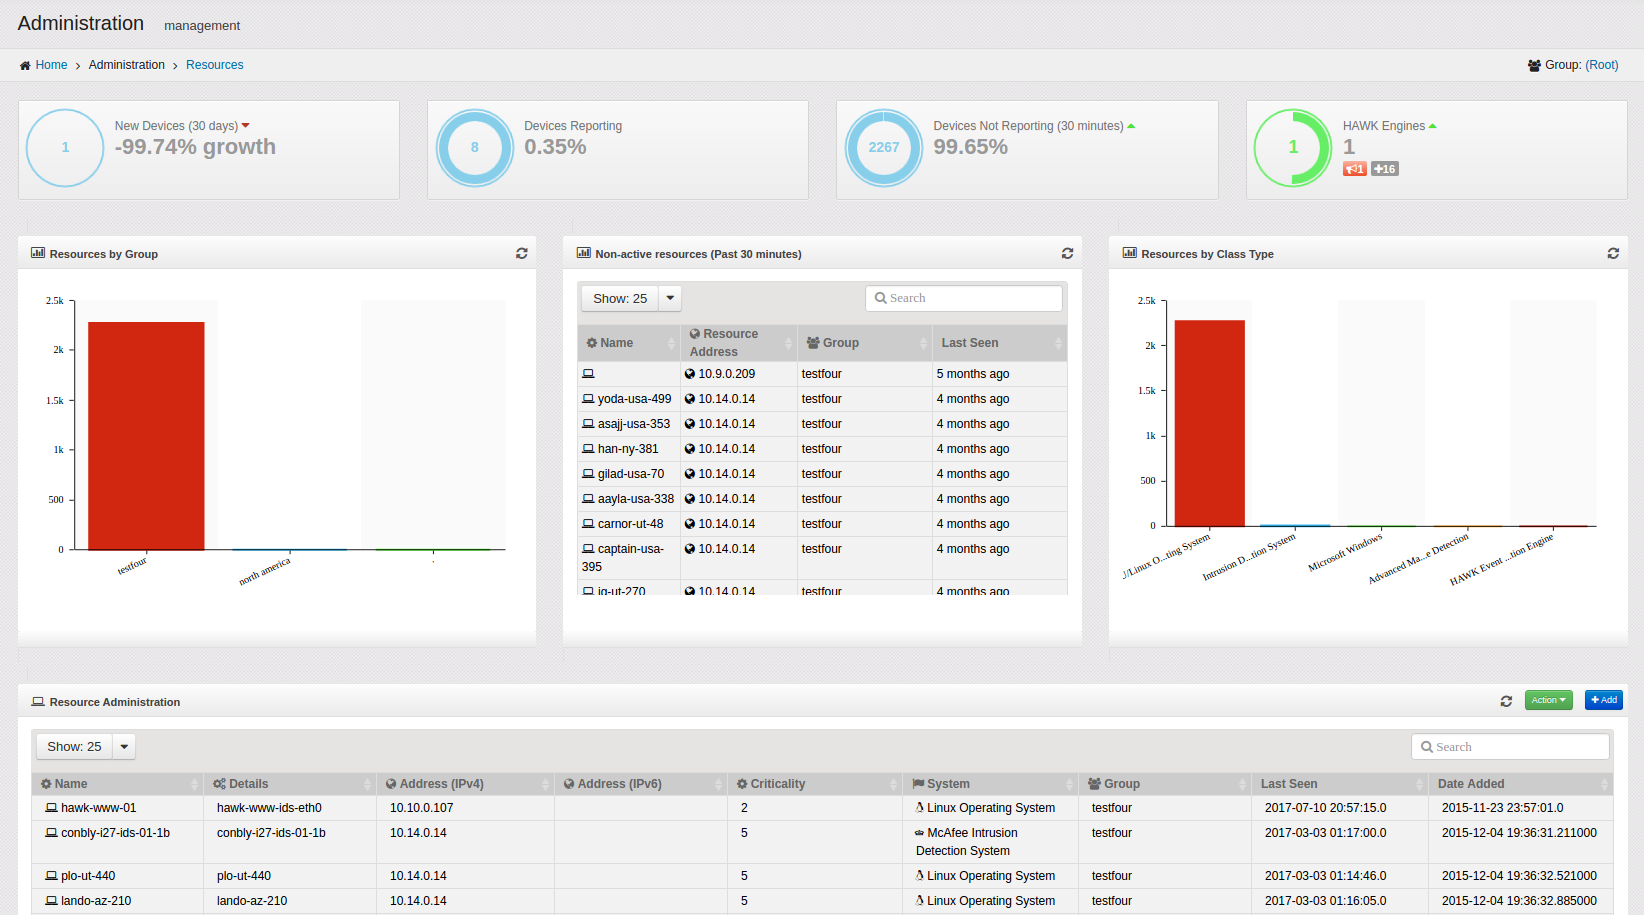
The top section of the Resources Dashboard contains the following:

This top section displays information regarding the:
New Devices - Displays the number of new devices that have been added to the network the past 30 days and are reporting to HAWK. This also indicates the percentage of overall growth of the system the past 30 days.
Devices Reporting - Displays the total number of devices reporting to HAWK on the network, and the percentage of devices reporting at the current time.
Devices Not Reporting - Displays the percentage of devices which have not reported to HAWK in the past 30 minutes. These could be due to outages at the reporting device’s location, network outages, ISP outages, etc.
HAWK Engines - Displays the number of HAWK Engines reporting at this time.
There are four Widgets shown in the Resource Administration window.
Resources by Group - Displays the Groups and the total number of Resources for each Group which are currently reporting to HAWK.
Non-Reporting Resources - Displays the name of the Resource, the Group, and the last time the device reported data to HAWK.
Resources by Class Type - Displays the Resources that are reporting to HAWK arranged by Class Type.
Resource Administration - Shows the Name, Details, IP Addresses (IPv4 and IPv6), System, Group, Date last reported, and Date added to the network.
4.1.2. Viewing Different Resources by Group
Since the Resources are arranged by Groups, the analyst can select a different Group by following these steps:
On the navigation panel, click on

The Resource Administration Management Dashboard opens.
On the top right side of the Group Administration window, click on the link to the Group shown. In this example, the Group is (Root).

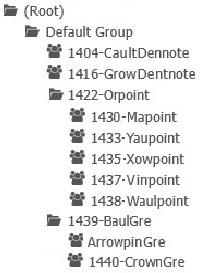
The “Select Group” window opens.
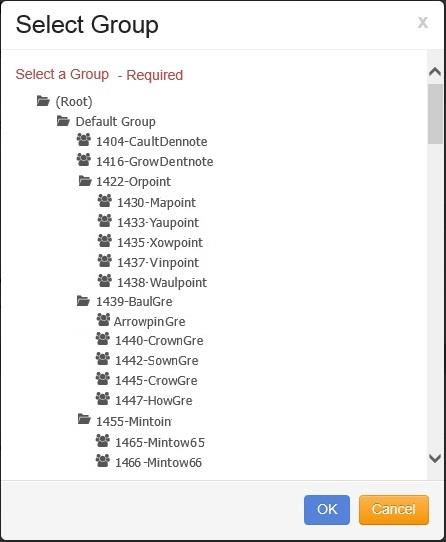
Click on the desired Group.
Click on the button and the selected Group is changed on the Resource Administration window. The Widgets displayed reflect the data in the selected Group.
4.2. Managing Resources
There are additional activities that can be performed for the Resources, as shown in the following sections:
4.2.1. Creating New Resources
When new Resources that need special configuration are added to the network, they are created by following these steps. More information for specific configurations can be found in Event Collection Configuration documentation.
Note
Resources reporting into HAWK via Syslog will automatically be created.
On the navigation panel, click on
The Resource Administration Management Dashboard opens.
In the Resource Administration section, click on the button.
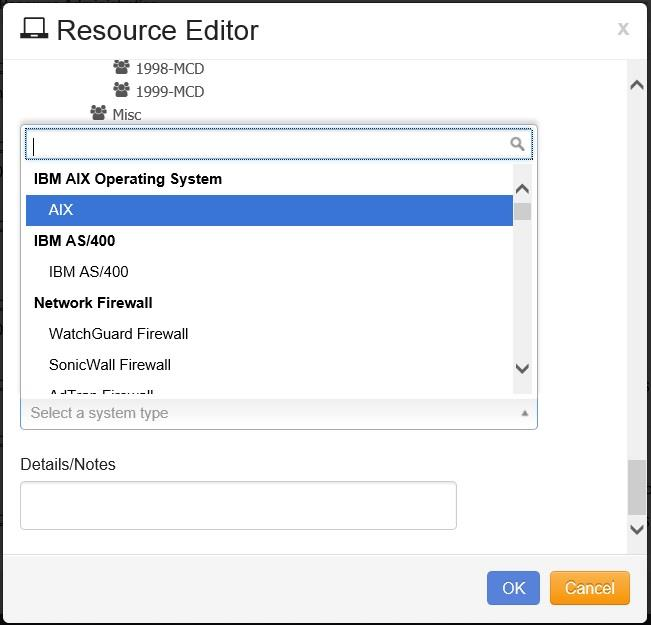
The “Resource Editor” opens, as shown:
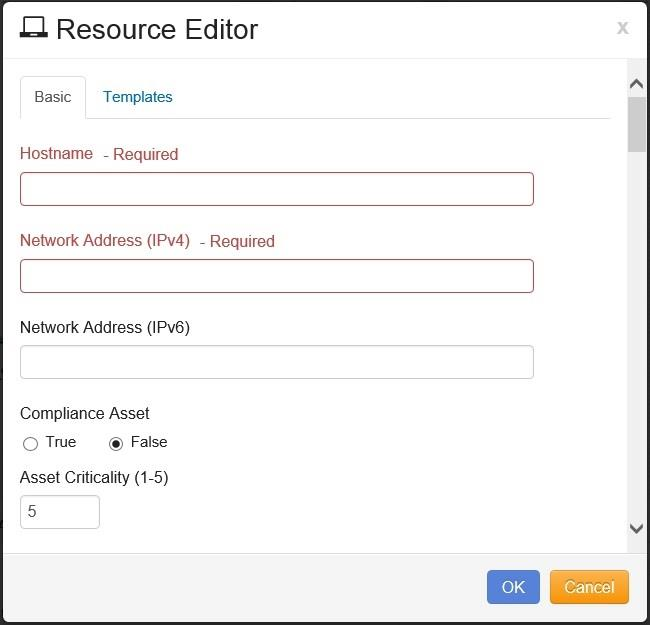
Enter the Hostname of the Resource.
Enter the IPv4 Network IP address for the new Resource.
Enter the IPv6 Network IP address for the New Resource.
If the Resource is designated as a Compliance Asset, click on the radio button by “True”, if the Resource is not designated as a Compliance Asset, click on the radio button next to “False”.
Enter the Critical value for the risk to the Asset in the Asset Criticality Field.
There are five levels which identify the criticality of the Asset, which are:
Level 1 - Critical/Sensitive Data (Highly sensitive and critical data)
Level 2 - High (very important data)
Level 3 - Moderate
Level 4 - Low
Level 5 - Very Low
Note
For more information on criticality please see Reference Guide Section
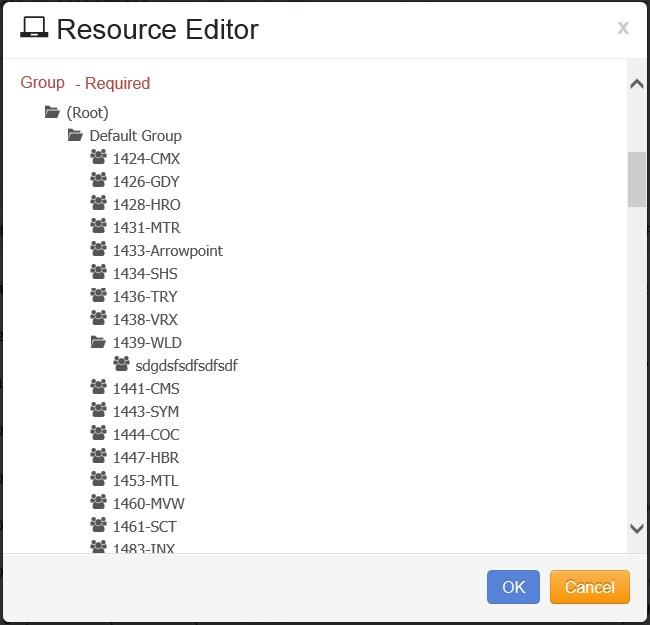
Scroll down to the Groups section and select the specific Group to which the new Resource is assigned.
Scroll down to the System Type, and click on the drop-down arrow to select the System Type for the new Resource.
Enter additional detailed notes in the Details/Notes section.
When all information for the Resource is entered, click on the button.
The new Resource is added.
4.2.2. Moving Resources
If the Resource has to be moved to another Group, follow these steps:
Note
Moving a resource will not move existing data. The event data will remain in the existing group. This is done for compliance. Any new events after moving the resource will go into the new group.
On the navigation panel, click on

The Resource Administration Management Dashboard opens.
Select the Resource or Resources that you would like to move.
Click on the button.
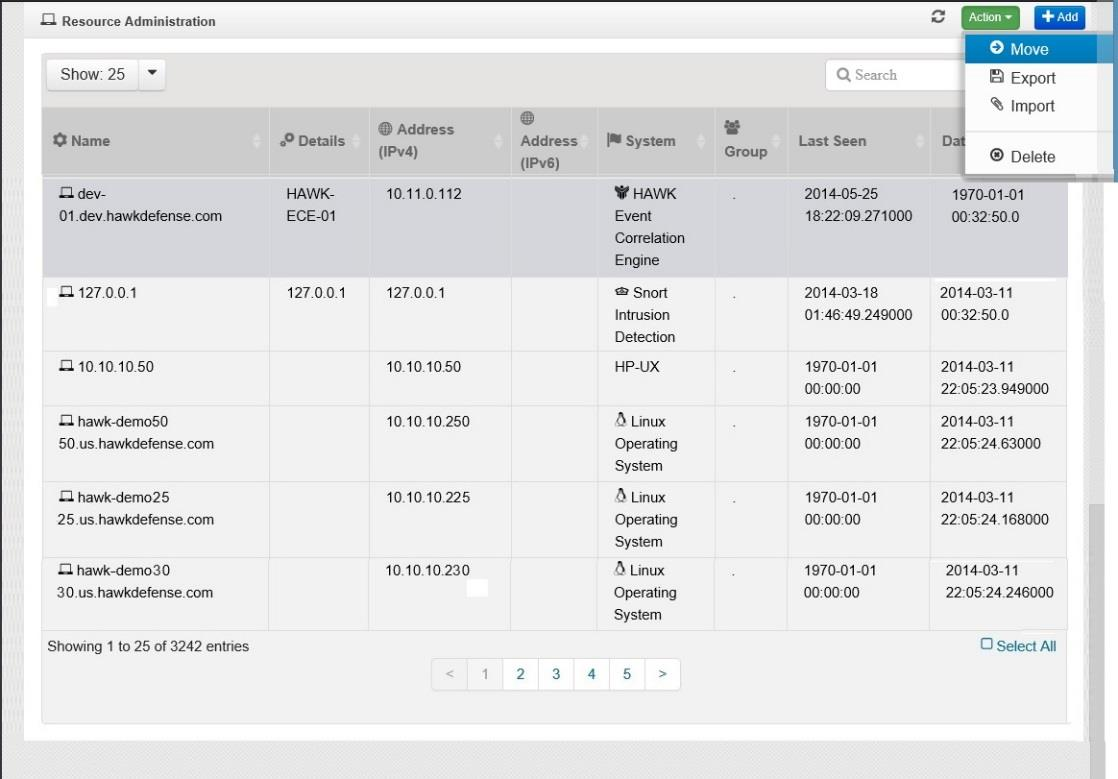
The “Move Resource” window opens:
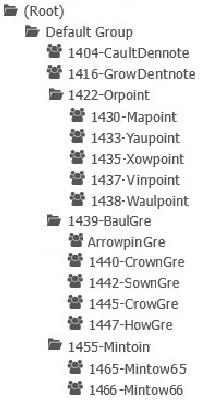
Select the Group where the Resource is to be moved.
Click on the button
The Resource is now moved and assigned to the selected Group.
4.2.3. Exporting Resources
If there is data in a Resource that needs to be exported to a spreadsheet or flat file, follow these steps:
On the navigation panel, click on

The Resource Administration Management Dashboard opens.
Click on the Resource or Resources you want to export.
Click on the button.
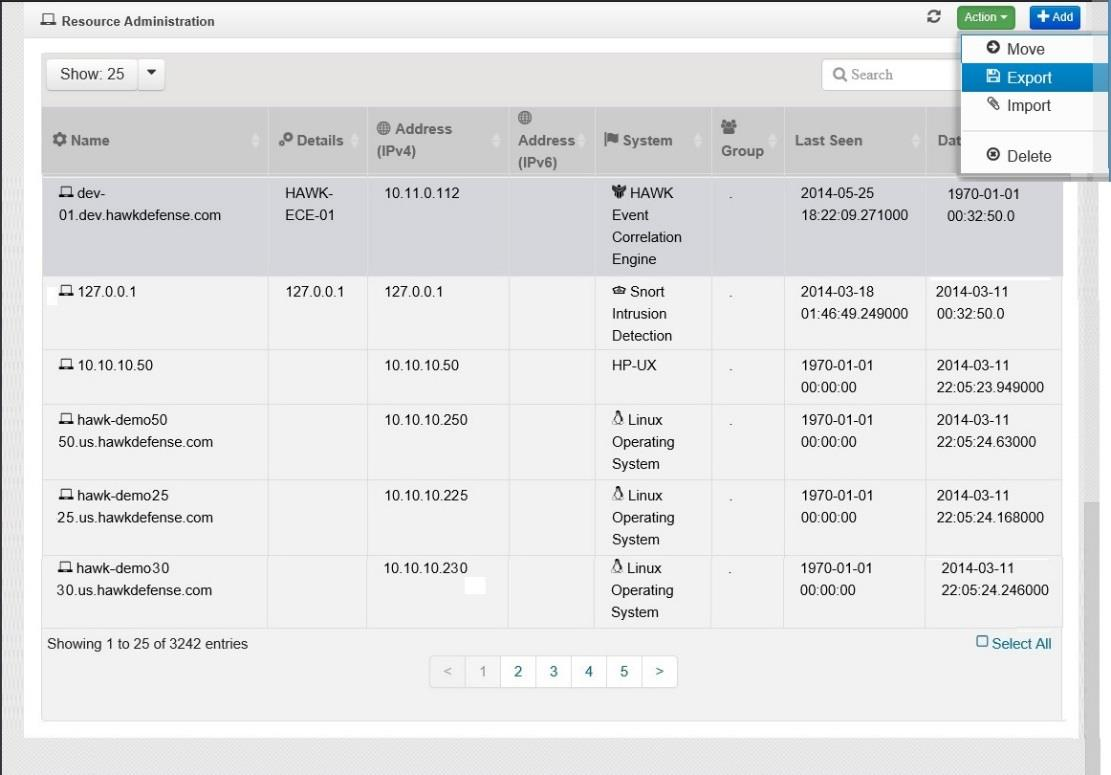
The window opens to select the export destination.
The system exports the data to the selected destination.
4.2.4. Importing Resources
If there is data from another file that needs to be imported into the Resource, follow these steps:
On the navigation panel, click on

The Resource Administration Management Dashboard opens.
Click on the button.
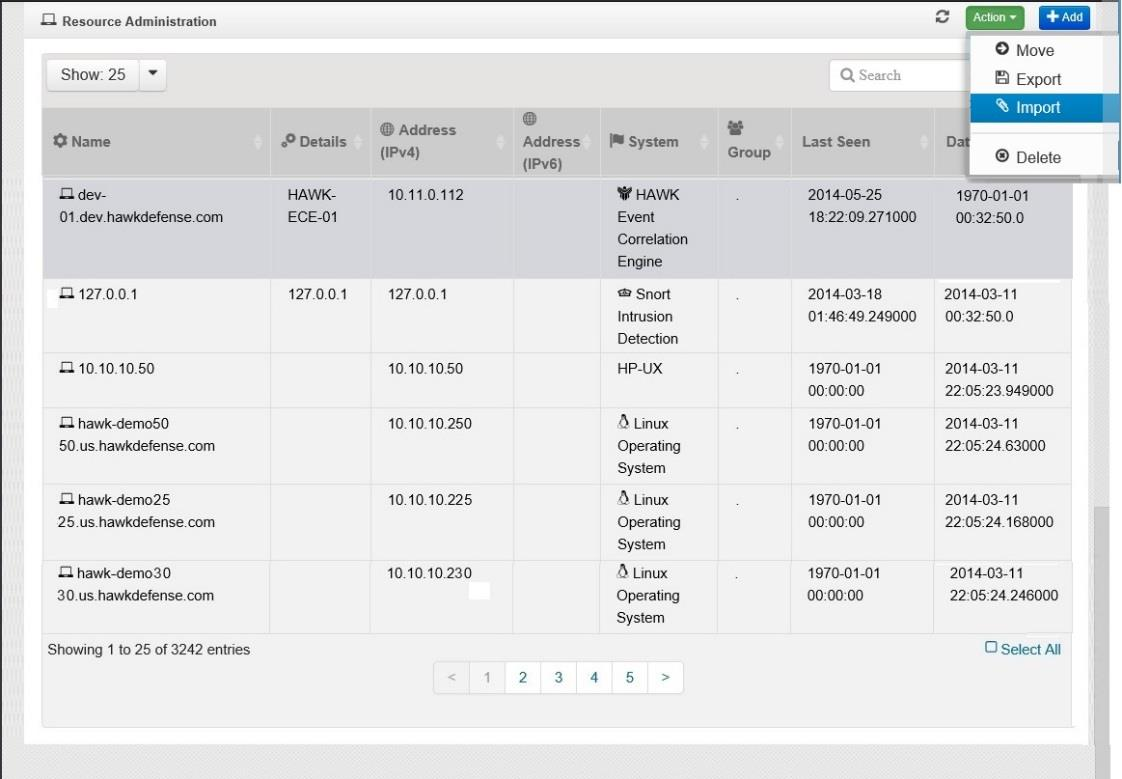
The “Choose File to Upload” window opens.
Navigate to the desired file and click on the “Open” button.
The data is now uploaded.
4.2.5. Deleting Resources
If a Resource has been decommissioned, or is no longer reporting to HAWK, it can be deleted from the Resource list by following these steps:
Note
Deleting a resource does not delete the data.
On the navigation panel, click on

The Resource Administration Management Dashboard opens.
Click on the Resource or Resources which are to be removed.
Click on the button.
A confirmation dialog box opens to verify that the selected item is to be deleted.
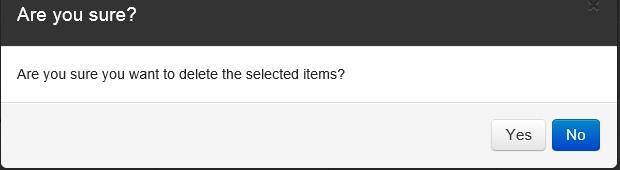
Click on the “Yes” button to delete the selected Group.
Click on the “No” button to cancel the delete Group request.